April 10, 2026
How to Edit a Two-Camera Podcast in Premiere Pro
A step-by-step guide to editing a two-camera video podcast in Premiere Pro using multicam — from syncing your footage to switching between speakers.
You’ve got two cameras pointing at two speakers. Now you need to turn that into a watchable podcast episode. If you’ve been doing this by hand — watching the footage, cutting to whoever’s talking, adjusting every single edit point — you know how tedious it gets, especially for longer episodes.
Premiere Pro has a built-in multicam feature that speeds this up a lot. Here’s what the end result looks like:
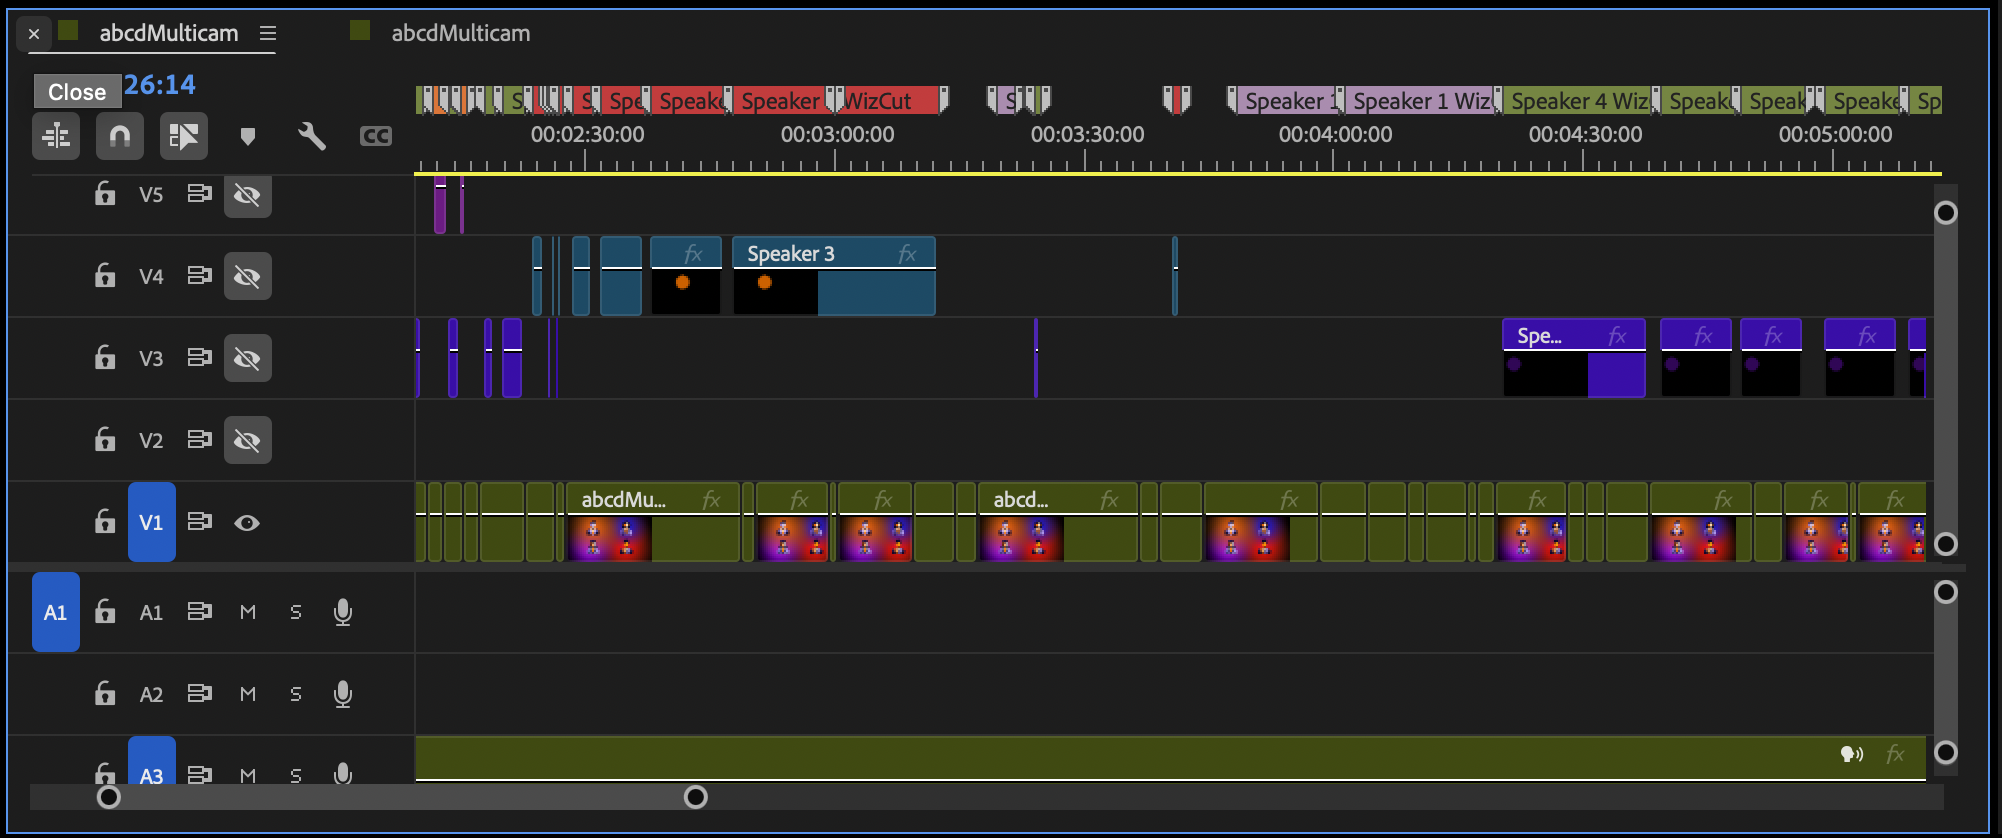
A multicam edit in Premiere Pro. Every cut is an angle switch you can adjust with a single click.
This guide walks through the whole process, step by step. No fancy plugins required, just Premiere Pro and your two camera files.
What you need before you start
- Two video files, one from each camera
- Audio — either separate tracks per speaker (from lapel mics) or a single mixed recording
- Adobe Premiere Pro
That’s it. You don’t need matching cameras, matching codecs, or matching frame rates. Premiere handles the differences.
Step 1: Import and organize your clips
Drop both camera files into a new bin in your project panel. Name them something obvious — “Camera 1 - Host” and “Camera 2 - Guest” works fine. You’ll thank yourself later when you’re staring at a multicam grid.
If you recorded audio separately, import those files too and put them in the same bin.
Step 2: Create a multicam source sequence
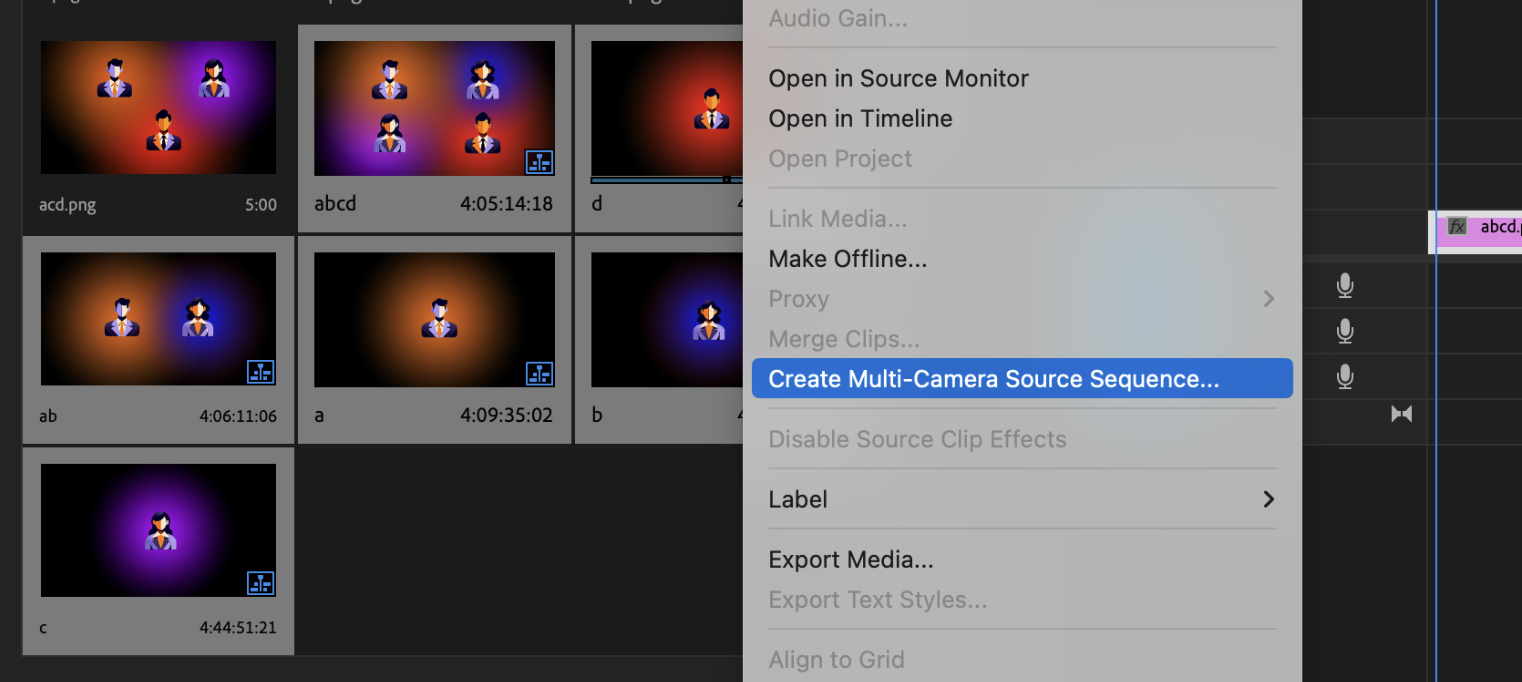
Select both video clips in the project panel (plus your audio files if they’re separate). Right-click and choose Create Multi-Camera Source Sequence.
Premiere will ask you how to sync the clips. Your options:
- Audio — Premiere analyzes the audio waveforms from both cameras and lines them up. Works great as long as both cameras recorded some ambient audio. This is what you’ll want in most cases.
- Timecode — if your cameras were synced to the same timecode source. More precise but requires setup before recording.
- In Points — manual sync. You set the in point on each clip (like a clap or a slate) and Premiere aligns from there.
Pick Audio and hit OK.
Step 3: Create an editing sequence
You now have a multicam source sequence, but you can’t edit directly on it — you need a regular sequence that contains it. Right-click the multicam source sequence in the project panel and choose New Sequence From Clip. Premiere creates an editing sequence with the right settings to match your footage.
Step 4: Enable multicam view
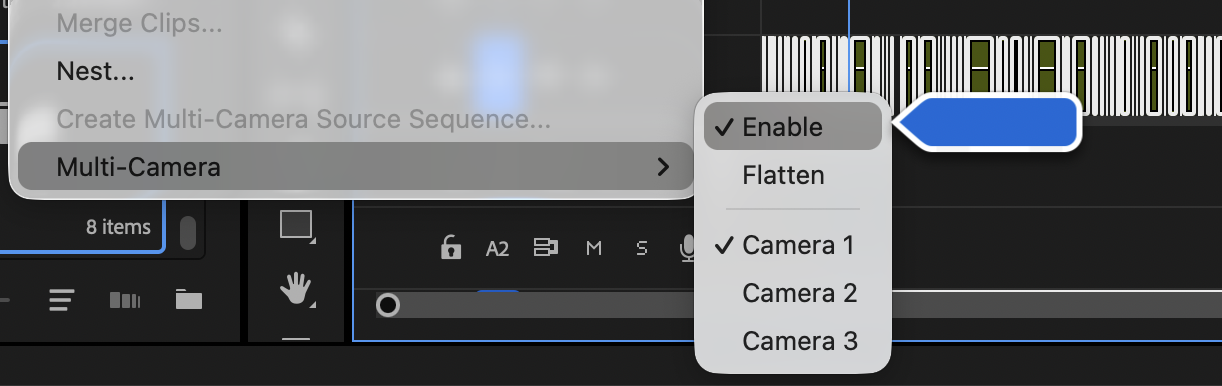
With your sequence open, right-click on the clip in the timeline and go to Multi-Camera > Enable.
Now open the Program Monitor and switch it to Multi-Camera view (click the wrench icon or right-click the monitor). You should see both camera angles side by side.
Step 5: Switch between angles
Hit play and watch your footage in the multicam view. When you want to switch to a different camera angle, click it in the program monitor — or use the number keys (1 for Camera 1, 2 for Camera 2).
Premiere creates a cut at that point in the timeline automatically. You’re directing the episode in real time.
A few things to know as you work:
- Pause whenever you need to think. You don’t have to do this in one take.
- Use J / K / L to scrub backward, pause, and play forward. This is how you’ll spend most of your time — scrubbing, listening for the moment to switch, and making cuts.
- If you miss a cut, just play back and click the correct angle at the right spot. The cut updates immediately.
How to make the cuts actually good
The technical setup is the easy part. Knowing when to cut is what separates a good podcast edit from a distracting one.
Let shots breathe. Don’t switch on every sentence. Holding on the same angle for a few seconds feels natural. Cutting too often makes the viewer feel like they’re watching a tennis match.
Cut to who’s about to talk, not who just finished. If you wait until the new speaker is mid-sentence, the edit feels late. Anticipate the switch — cut slightly before or right as they start.
Use reaction shots. Showing the listener while the other person talks adds visual variety and makes the conversation feel more natural. You don’t always need to be on the person speaking.
Make the video cut before the audio. A common trick: the new speaker’s voice starts first, then the camera switches to them a half-second later. Or the other way around — the camera cuts to the listener while the current speaker’s voice continues. Either feels smoother than cutting both at exactly the same moment. In editing terms these are called J-cuts and L-cuts.
Step 6: Fine-tune your first pass
Your real-time pass will be rough in places — cuts that landed a beat late, moments where you wish you’d stayed on the other angle longer. Go back through the timeline and clean those up.
- Move a cut a few frames. Drag the edge of a clip in the timeline.
- Change your mind about an angle. Park the playhead on the clip, open multicam view, and click a different angle. The clip updates instantly.
- Offset the video and audio cut. Drag the video edit point separately from the audio to create the J-cuts and L-cuts mentioned above.
This is where Premiere’s native multicam really shines. Because it’s a real multicam source sequence, you’re never committed to a cut — you’re just picking which angle to show at each moment.
Once this gets repetitive: automate the switching
After you’ve edited a few episodes by hand, you’ll notice something: the decisions are pretty predictable. For a two-person podcast, it’s almost always “cut to whoever’s talking.” You’re spending an hour making decisions a computer could make in minutes.
That’s why we built WizCut. It uses AI to detect who’s speaking and generates the multicam cuts for you — the same native Premiere multicam sequence you’d build by hand, just without the hour of real-time watching.
You still use everything from this tutorial: the multicam source sequence, the angle switching, the fine-tuning. WizCut just handles the first pass automatically so you can skip straight to reviewing and adjusting.
If you don’t use Premiere Pro, WizCut also has a standalone web version — upload your footage, review the cuts in a browser-based editor, and download the finished video. Same AI speaker detection, no NLE required.
A few things that make this work well for two-camera podcasts:
- AI speaker detection identifies who’s talking even with audio bleed between microphones. It’s not just checking which track is loudest — it actually recognizes individual voices.
- Works with any audio setup — separate mics per speaker, a single boom mic, or a mixed recording from Riverside/Zencastr.
- The output is a standard multicam sequence. You fine-tune it the same way you would after a manual pass — everything from the steps above still applies.
The manual workflow teaches you what a good edit looks like. The automation just saves you the tedious part once you already know.
For more detail on the multicam workflow in Premiere, see our complete multicam editing guide.