Editing Multicam with WizCut
Set up your Premiere Pro multicam sequence and use WizCut to automatically detect speakers and generate camera cuts.
WizCut analyzes your podcast or interview audio, detects when speakers change, and automatically generates camera cuts for your multicam sequence. This guide walks you through the complete setup—from preparing your footage to reviewing WizCut’s cuts in Premiere Pro.
Before you start
You’ll need:
- Adobe Premiere Pro (any recent version)
- Multiple camera angles recorded at the same time
- Audio from the session
- A WizCut account (sign up at wizcut.com)
Step 1: Import your footage
Import all your camera angles into your Premiere Pro project.
Step 2: Create a multicam source sequence
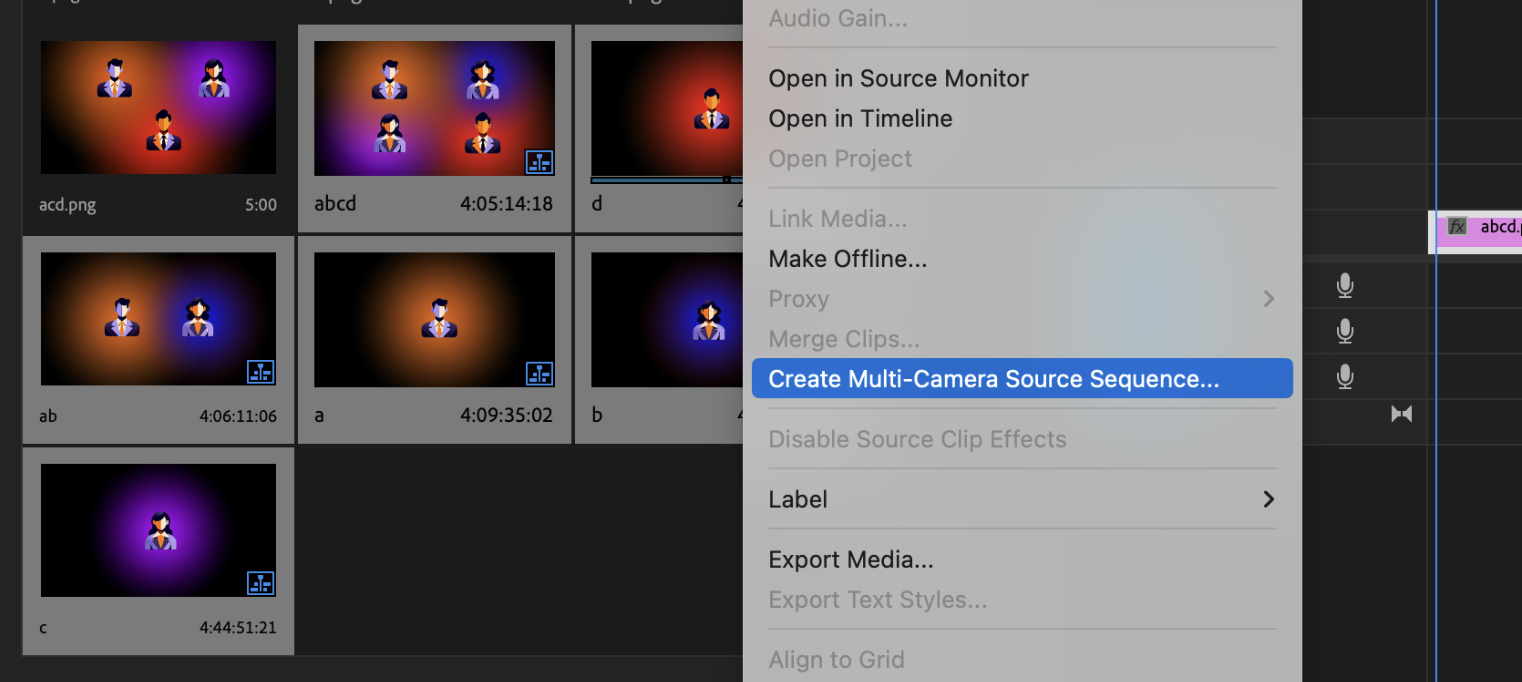
In the Media Browser panel (Project panel), select all your clips. Right-click and select Multicam > Create Multicam Source Sequence. Premiere Pro creates a new multicam source sequence with all your clips organized on separate video tracks.
Step 3: Create a target sequence
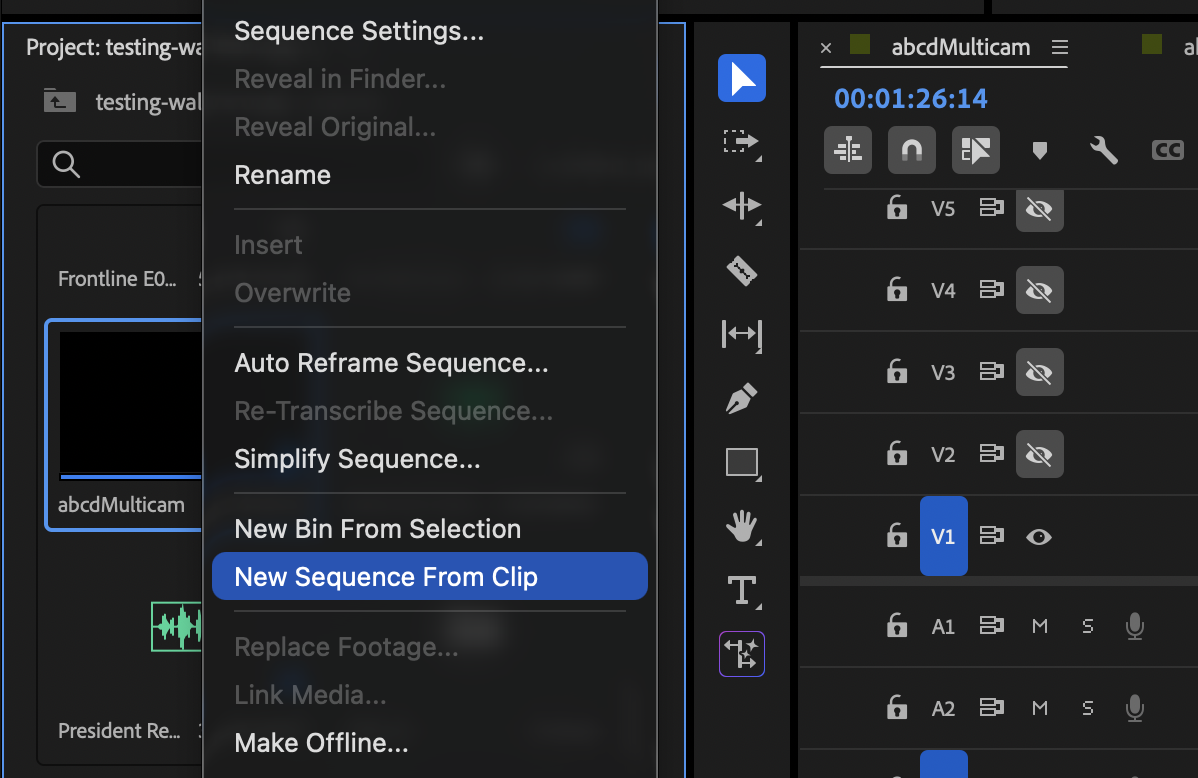
Find the multicam source sequence in your Project panel. Right-click it and select New Sequence From Clip. This creates a target sequence—your editing sequence where you’ll work and where WizCut will apply the cuts.
For more details on target sequences, see Adobe’s guide to creating multicam target sequences.
Step 4: Add your audio to the target sequence
Open the target sequence in your timeline and add your speaker audio file(s). This audio must be in the target sequence—the same sequence where the multicam clip is placed.
Premiere pro extensions generally can’t read multicam sequence audio properly, so make sure that the audio is on a single track beneath the multicam track.
Step 5: Enable multicam mode
With your target sequence open:
- Go to Clip > Multi-Camera > Enable.

- Test that it’s working: With the timeline focused, use number keys 1–9 to switch between camera angles. The angles should switch in your Program Monitor.
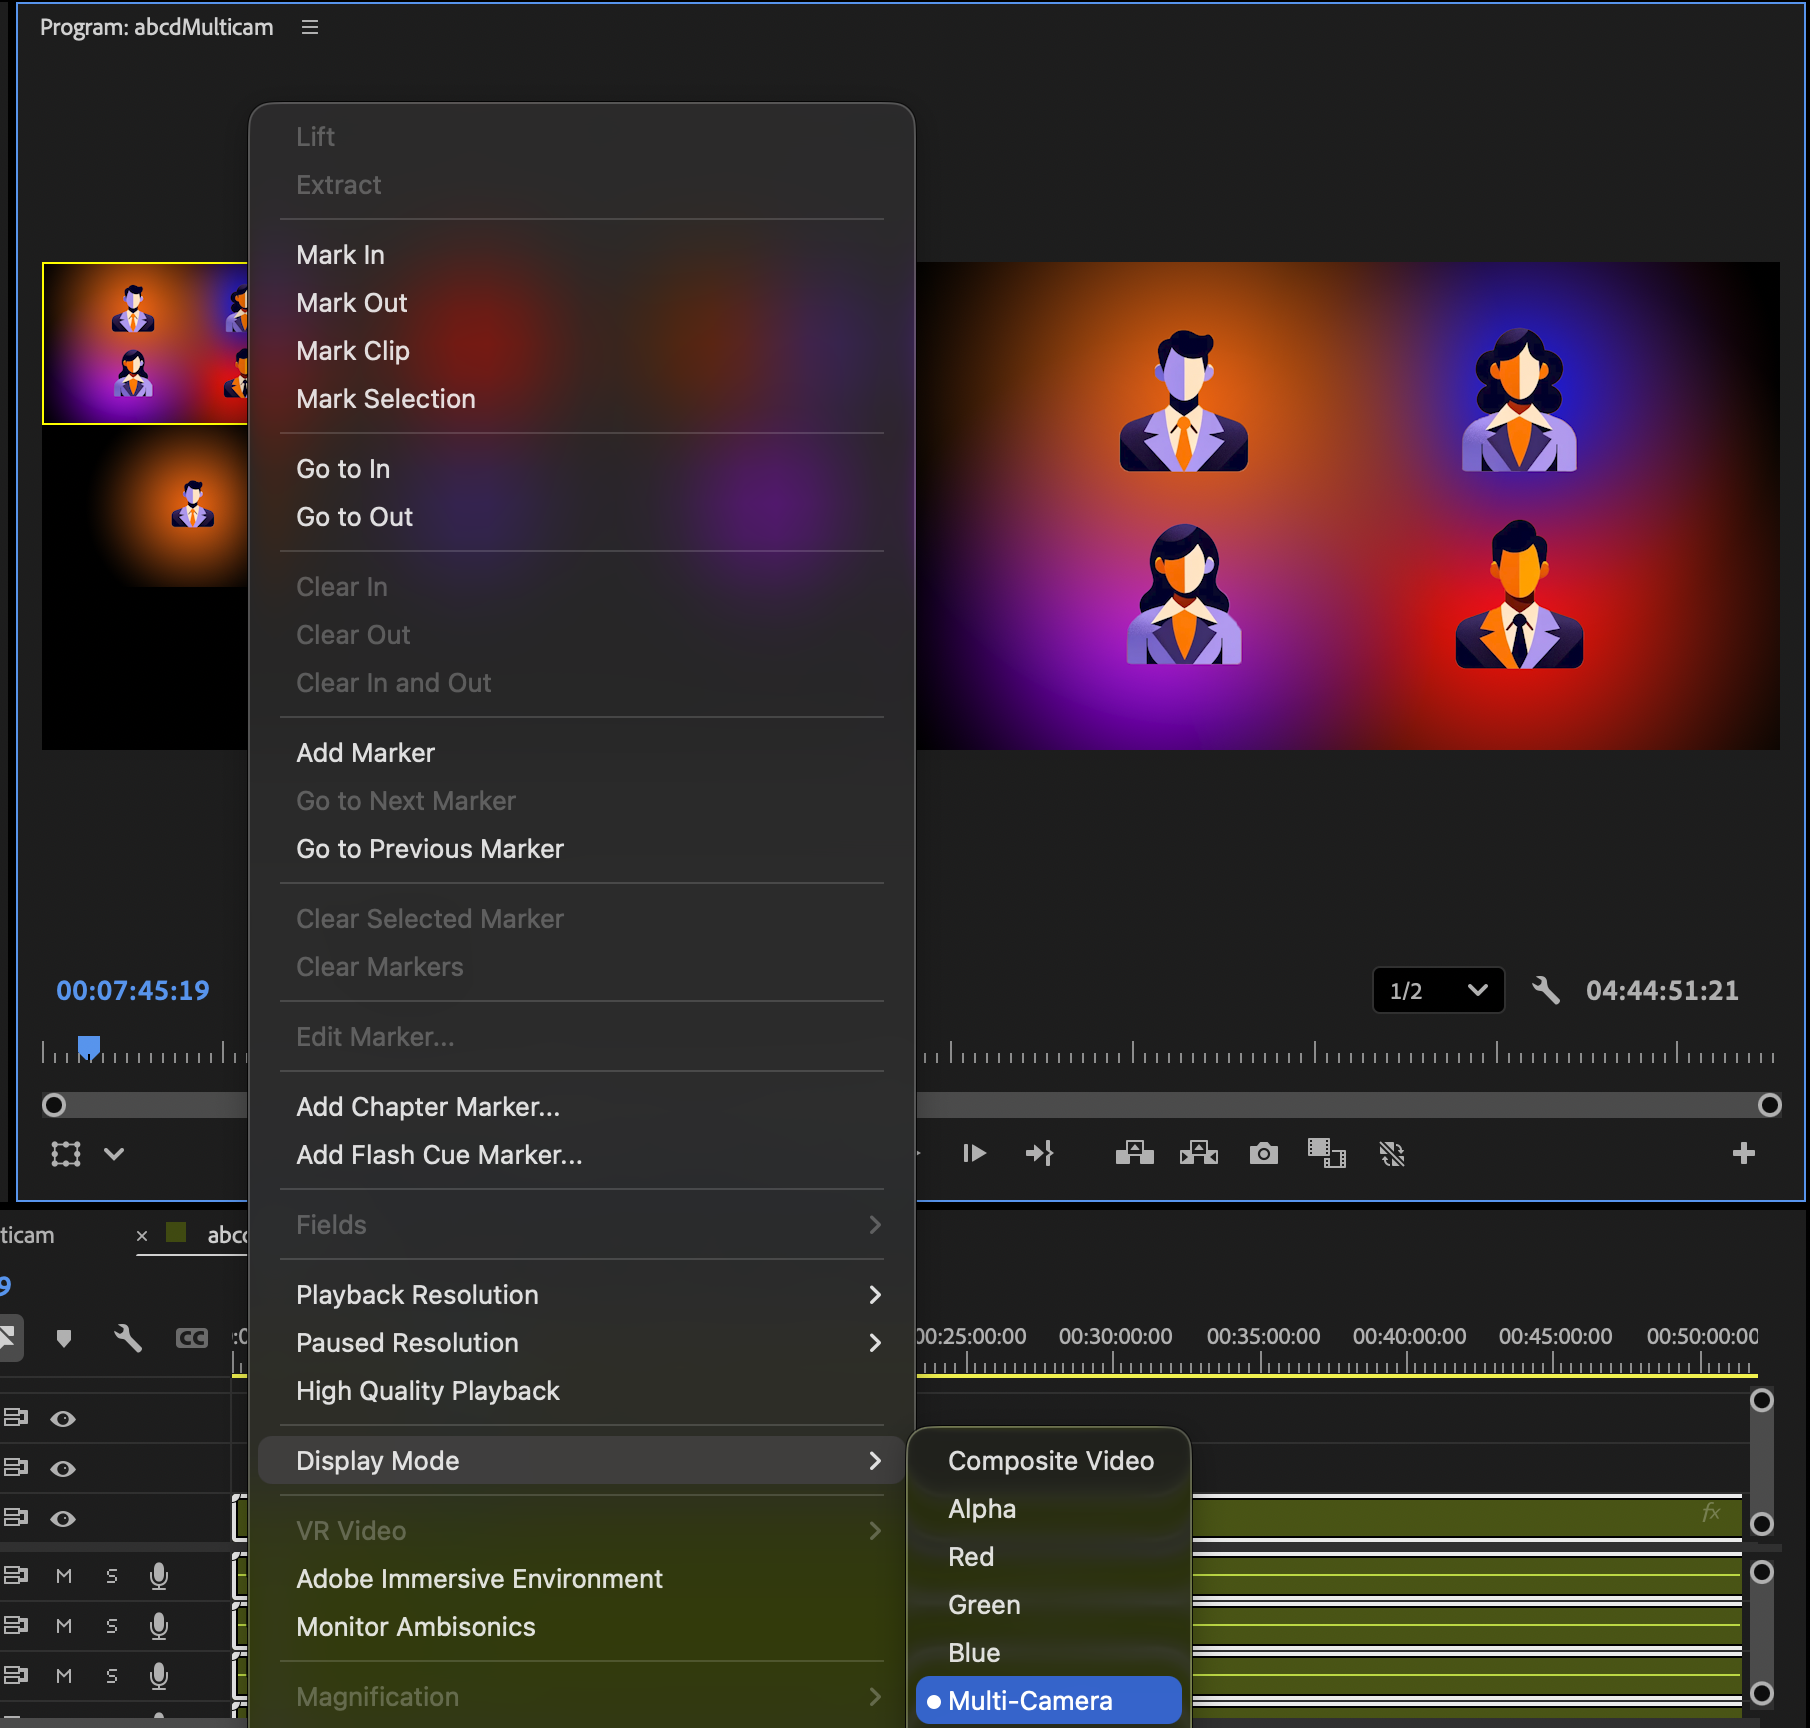
You can also right-click in the Program Monitor and select a display mode to view all angles at once as a multicam preview.
Should you need more help with Premiere’s multicam features, see Adobe’s official multicam editing guide.
Step 6: Open WizCut
Launch the WizCut extension via Window > Extensions > WizCut. Log in or sign up if you haven’t already.
Step 7: Analyze your footage
Follow WizCut’s steps to analyze your sequence. WizCut reads your audio and detects all the speakers in your session.
Step 8: Assign speakers to camera angles
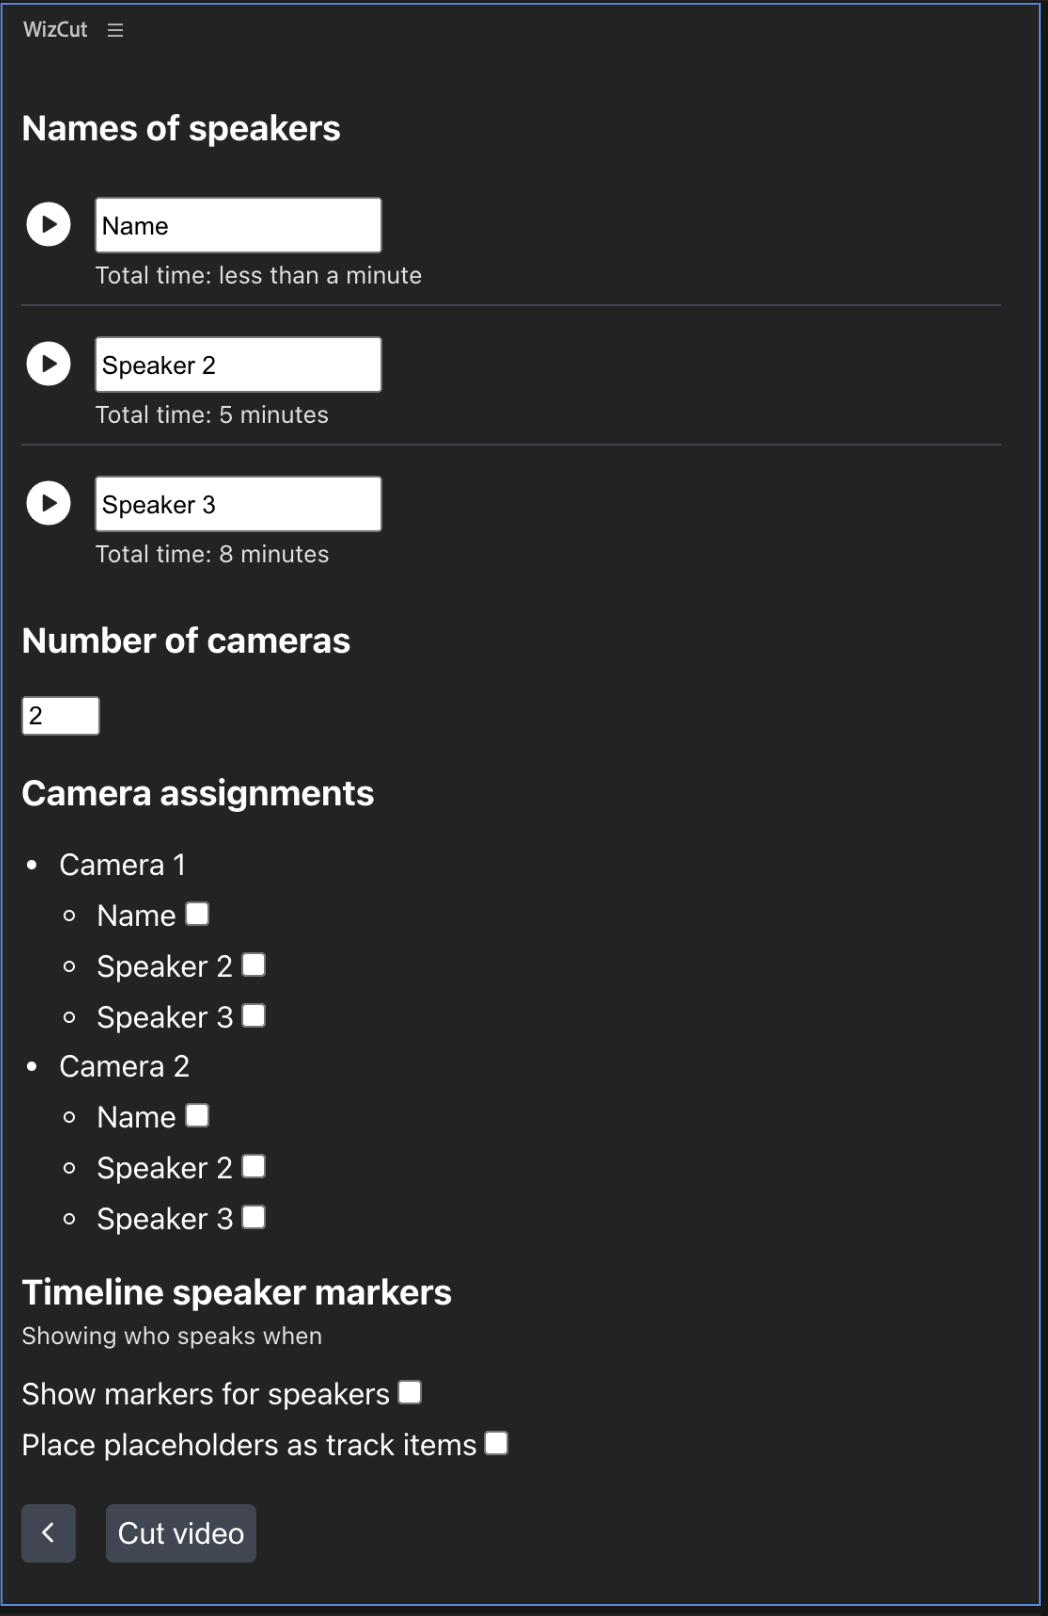
After analysis, WizCut shows you a list of detected speakers. For each speaker:
- Click the Play button next to their name. Premiere Pro jumps to where that speaker is talking.
- Listen and confirm who it is. You can rename them (e.g., “Host”, “Guest”) or leave them as “Speaker 1”, “Speaker 2”, etc.
Handling detection issues:
- A speaker appears multiple times: This might be a hum or breathing sound detected as a separate speaker. Just enter the same name multiple times—WizCut will merge them.
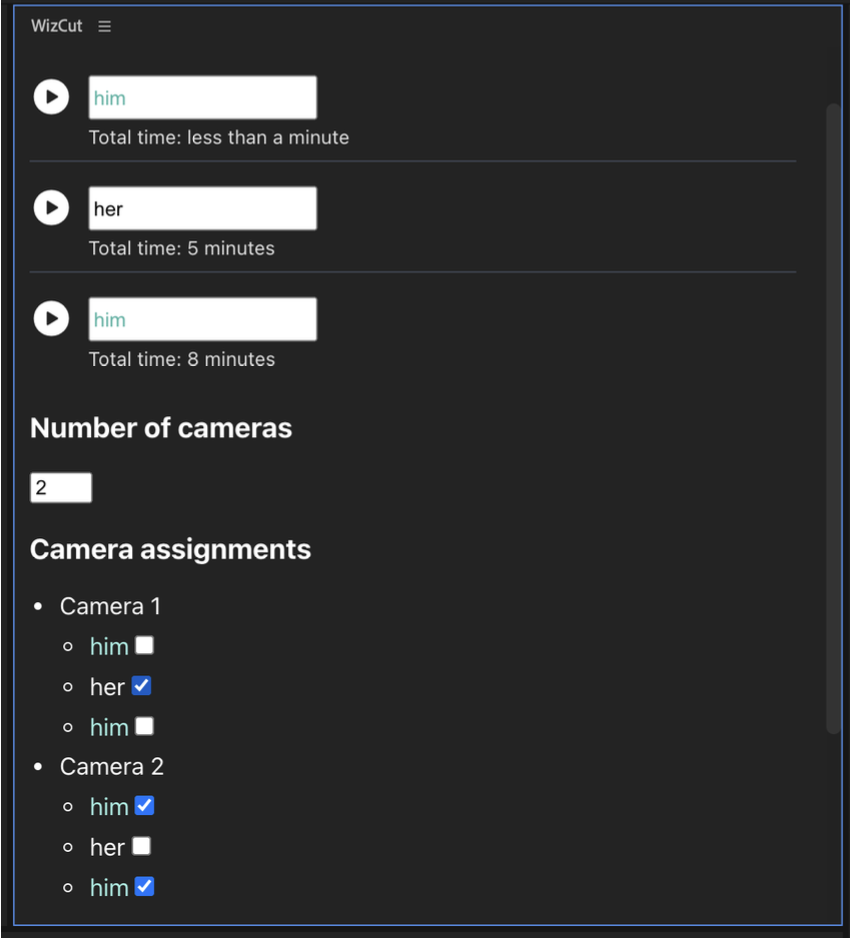
- Noise or off-camera voices: If a detected speaker is very short (marked “Total time: less than a minute”), or if you can’t identify who it is, you can ignore that entry. Just leave it blank.
- Something seems wrong? Contact support@wizcut.com for help.
Step 9: Configure camera settings
Tell WizCut how many camera angles you have in your multicam sequence. Make sure you have the sequence open so you know how many tracks you used (V1, V2, V3, etc.).
Then select which speakers are visible on which cameras. Use the multicam sequence to reference which angle is on which track.
Step 10: Enable timeline markers (optional)
WizCut can add visual markers and speaker tracking to your Premiere Pro timeline. If you enable this, you’ll see:
- Color-coded markers showing where speakers change
- Placeholder tracks showing which speaker is active at each moment

You can hide these tracks later if they clutter your timeline. This helps you visualize the speaker changes before cuts are applied.
Step 11: Focus your timeline
Before WizCut processes, click on your target sequence’s timeline to focus it. The timeline will have a blue border when it’s active. This ensures WizCut sends its output to the right place.

Step 12: Process and wait
Click the process button in WizCut. Processing time depends on your footage length. Once complete, WizCut sends the cuts to your Premiere Pro timeline.
Step 13: Review the cuts
Once WizCut is done, check your timeline. You should see cuts at speaker changes. Play through and review:
- Do the cuts happen at natural moments?
- Are the angles switched correctly?
- Are there any mistakes you want to fix?
You can manually adjust cuts if needed—just use Premiere Pro’s standard editing tools (like keys 1–9 to change camera angle) to move them or delete unwanted cuts.
Tips for the best results
- Clean audio: Remove loud background noise, fan hum, or other distractions before processing. WizCut listens to detect speakers, and noise makes that harder.
- Balanced levels: If one speaker is much quieter than another, WizCut might have a harder time detecting them. Try to balance levels before analyzing.
- Tight sync: Make sure your camera angles are synchronized. If they drift out of sync during the session, WizCut’s cuts will look off.
- Similar framing: Angles that are wildly different (one zoomed in, one very wide) can make jump cuts look jarring. Aim for consistent framing across cameras.
- Multiple audio tracks: If you have multiple mics (lavalier, camera audio, etc.), WizCut uses all of them to detect speakers.
- Music and ambience: If you want to add music or ambience, do it in a separate sequence that imports your WizCut-edited multicam sequence. Don’t add music to the same timeline as your audio analysis.
Questions or feedback?
If something doesn’t work as expected, email support@wizcut.com.
For a general guide on setting up multicam sequences in Premiere Pro, see our Premiere Pro multicam guide.